
Tutorials
Create a kaleidoscope effect in Photoshop
There are plenty of collage maker tools out there, but none are quite as satisfying as creating your own collage using Photoshop CC or similar software. The kaleidoscope effect above was discovered when trying to combine photography and collage elements, and here we'll take it a step further. You can apply this method to any existing imagery, turning it into an abstract, intriguing pattern.
Over the following steps, I'll show you how to create a complex-looking image: we'll experiment with a variety of imagery, marks and photos – or whatever elements you already have – to build up a digital collage with a handmade feel. And unlike when you're creating purely handmade work, the possibilities to experiment are endless because you can always click Undo. Once created, you can take your image and turn it into a fascinating pattern, background or wallpaper.
- Software: Photoshop CS4 or later
- Project time: 2-3 hours
- Skills: Combine handmade and digital elements, use Layer Styles, create patterns
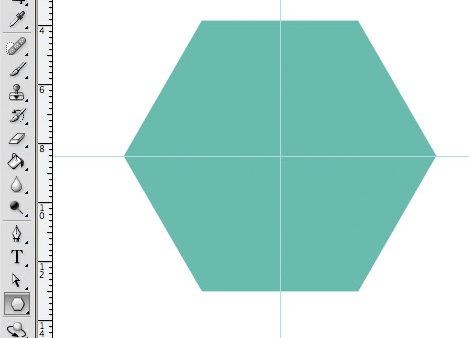
01. Create a hexagon
First, open Photoshop and create a hexagon in an A4 document. This is the basic shape that your kaleidoscope will follow. For a more intricate, abstract appearance, create a shape with more sides. Using the Polygon tool, make a fairly large hexagon, then drag rulers from the top and side to find the centre of the shape - they will snap to the middle.
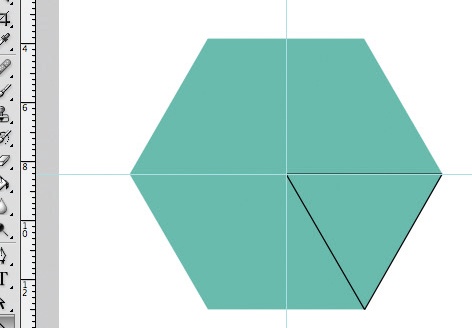
02. Create a triangle
Using a different colour to the hexagon, select the Line tool with a 5px weight. Draw three lines to create a triangle from the centre point out to one of the straight sides, then merge these three layers together. This triangle will be a guide for the shapes and the size of the image you create.
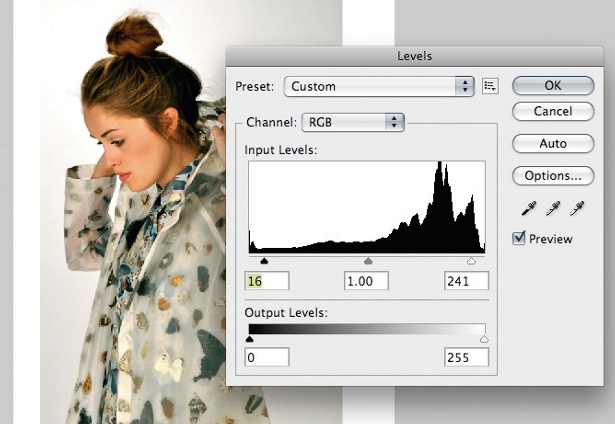
03. Import your image
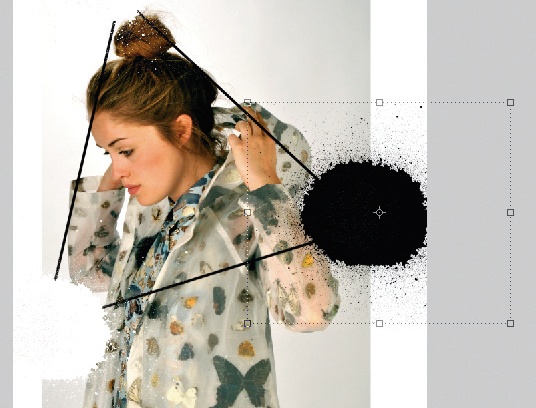
Open a new A4 document and place a photo of a figure (I've supplied one, but feel free to use your own) in the centre. Use Levels (Cmd/Ctrl+L) to brighten up the image, slightly increasing the black and decreasing the white levels. At this stage you could edit out the background completely if you wish, to make a cleaner image.
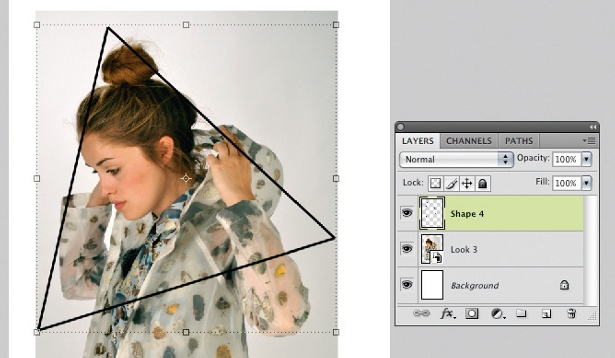
04. Drag over the triangle
Return to your first hexagon document and drag the triangle over to the document with the placed photo in it. This will be used as a guide for creating the collage on top of the photo. You can change the size of the triangle and move it around until you decide which part of the photo that you wish to use.
05. Create some funky patterns
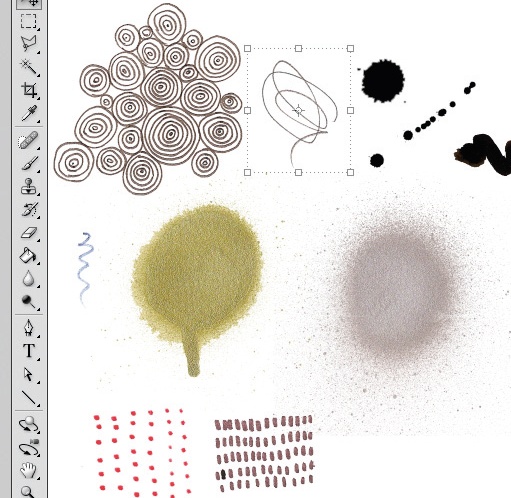
It's time to step away from the screen and create some handmade marks, patterns and shapes using materials such as ink and spray paint. The marks I've chosen are fairly organic to contrast with the structured nature of the kaleidoscope. When you're done, scan in the materials (or use the ones included).
06. Tidy up your marks
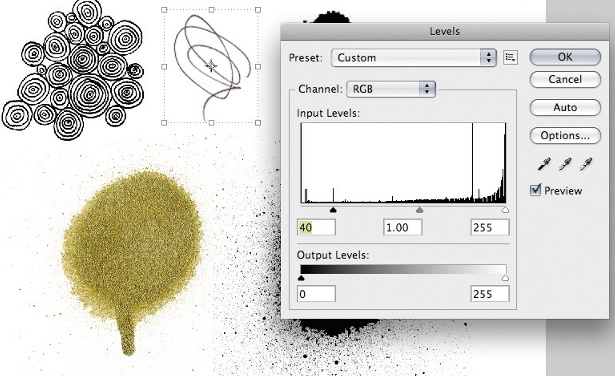
Open the marks in Photoshop and decide which ones you want to use. With the Rectangular Marquee tool, select each mark, and copy and paste each one into a new layer so that they can be edited individually. Now delete the background layer of your initial marks. Using levels again, greatly increase the black and reduce the white to make the marks more solid.
07. Add a mark
Choose the black spray paint mark supplied, and drag it over to your photograph document. Using the Magic Wand tool, select the white space around the mark and delete it. Invert the colour of the mark (Cmd/Ctrl+I) to make it white, and place it in one corner of the triangle. Using the Hand tool, hold down Opt/Alt and drag the mark to duplicate it and place it in another corner. Repeat again for the last corner.
08. Add another mark
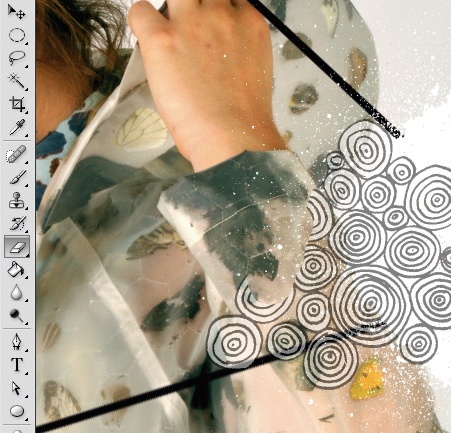
Now drag the circle pattern across to the photo and rasterise this layer. Again, as in step 07, delete the background and then place the circles as if they are growing around the model. Lower the opacity so that you can see the model below. As before, duplicate these a number of times around the composition. Using the Eraser tool, remove the unwanted parts of the circles leaving some overlapping the model. When you're happy, increase the opacity of all the shapes back to 100% again.
09. And more…
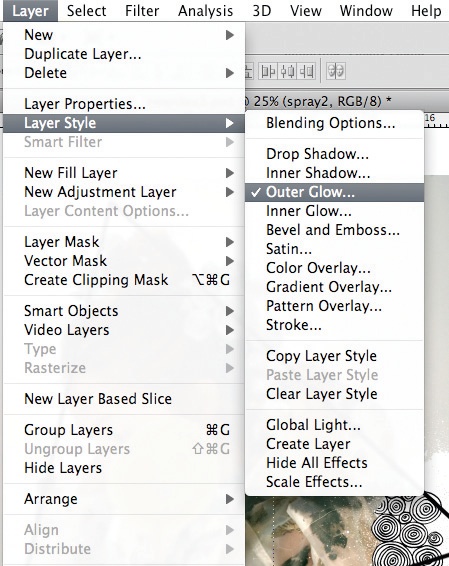
Back to the handmade marks: choose the gold spray paint, drag it over to the photo and erase its background. Use the Free Transform command on this shape (Cmd/Ctrl+T) to alter its size, then position it to mask part of the model's face. To make it appear more realistic, add an outer glow (Layer>Layer Style>Outer Glow), choosing the Screen blending mode with opacity set at 75% and noise at 25%.
10. Create a bubble
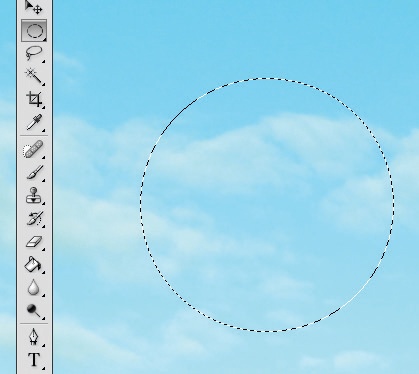
Open the supplied cloudy sky image in a new document, play with the levels and choose the green channel. Reduce the midtones to 1.75 to make the image more vibrant. Then, with the Elliptical Marquee tool and holding down Shift, drag out a circle. Copy this shape and paste it onto the photo. Add a layer style to the shape, choosing Soft Light and setting the opacity to 88%. This creates a bubble-like effect. As before, duplicate the bubble a number of times around the image, altering its size.
11. Add a handmade look
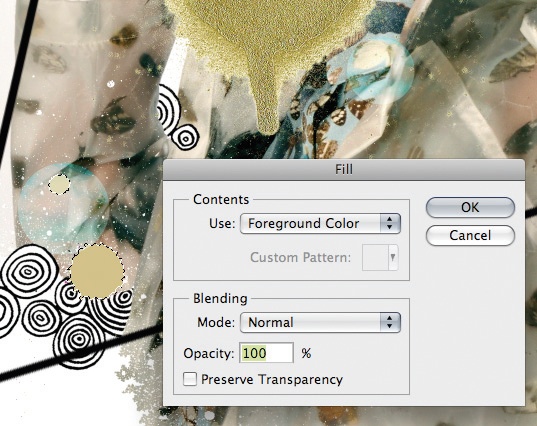
Now drag across the black splatter shape. Select part of the mark using the Magic Wand tool, then go to Select>Similar so that all parts of the splatter are selected. Change their colour by using the Fill panel (Shift+F5). Use the Color Picker to select a golden tone from the spray-painted mark. As with the bubbles, duplicate these marks, arranging them around the composition to create a random, handmade look.
12. Add some more detail
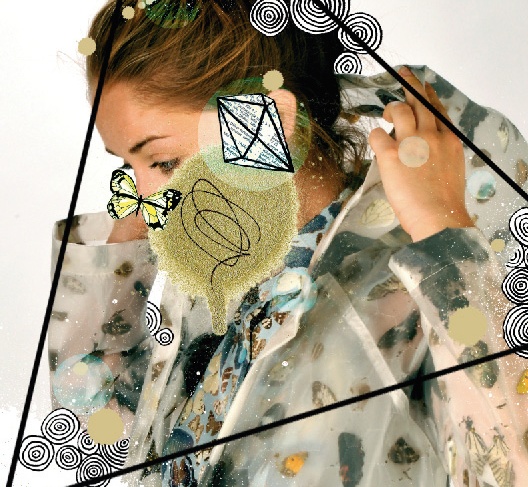
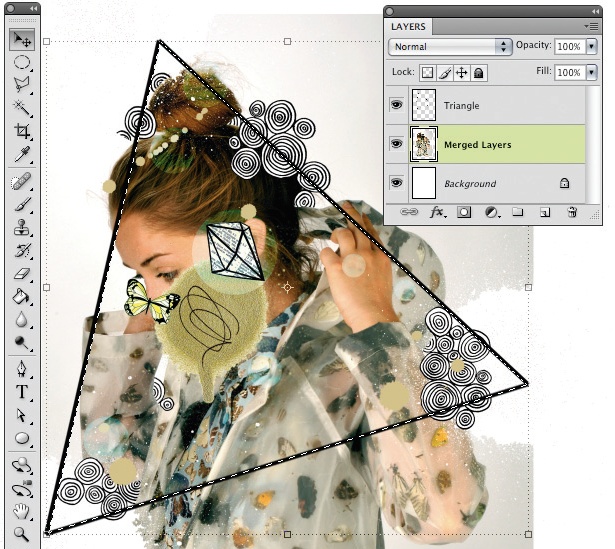
For some finishing touches to the collage, add some more elements of detail. I chose to use a handmade squiggle, which I placed over the spray paint, along with a more detailed diamond shape and a butterfly drawing, which reflects what is on the outfit worn by the model.
13. Create the kaleidoscope
Now let's turn the collage into a kaleidoscope pattern. Make sure the triangle guide layer is at the top, and then merge together all the other layers, bar the triangle layer. Choosing the merged layers, select the Polygonal Lasso tool and carefully trace the triangle shape.
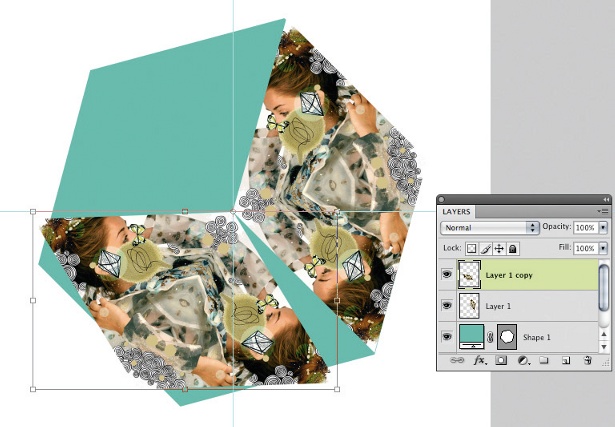
14. Duplicate the triangles
Create a new document at 222x300mm and 300dpi for the final pattern, and drag across the cut-out triangle. Duplicate the shape and flip it vertically (Edit>Transform>Flip Vertical). Next, use the Free Transform command (Cmd/Ctrl+T) to rotate this shape so it's against one edge of the first triangle, reflecting the image. Merge the triangles together to create one segment of your hexagon. Now duplicate this shape two more times to create the other segments and move them into place. Fitting the pieces in place correctly is easier with a hexagon shape guide to help you.
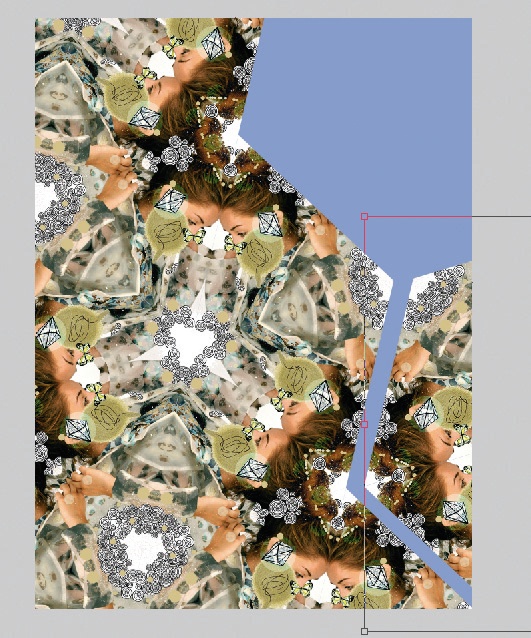
15. Duplicate the hexagons
Lastly, group all the segments of the hexagon and duplicate the shape by hittingOpt/Alt and dragging it. Now use Free Transform to rotate the hexagon shapes so they fit against one another like a jigsaw puzzle and create a kaleidoscope pattern.


0 comments: