
Tutorials
TV Interlaced Lines In Photoshop Photoshop Tutorial
n this tutorial, we are going to create the classic TV scan line effect or interlacing effect. This gives a cool feel to the image. This is a quick and easy way to give a photograph and interesting hi tech look, or just to add some visual interest. This really comes from the classic/vintage style that you would see on old televisions. This comes from one of my original tutorials on PhotoshopCAFE, but we give it a couple of twists at the end with some more advanced options.

with the foreground color set to black, take the pencil tool and paint the top half of the image.
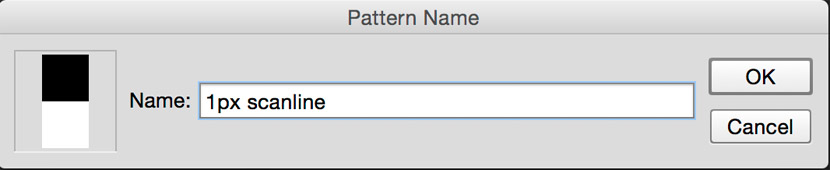
This box will come up, name your pattern. When you define a pattern, it is saved in the library for future use. Click ok
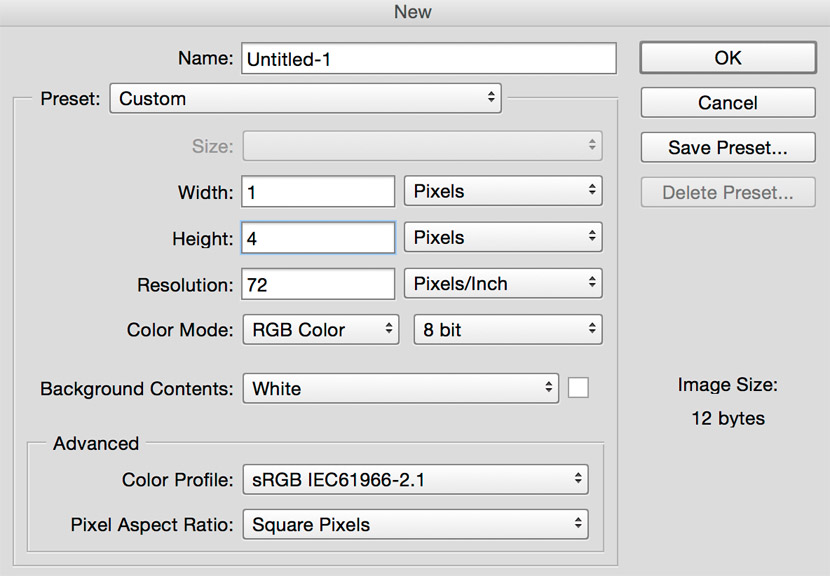
I usually make a number of different patterns at this point, so that I can have different thicknesses of lines, especially if you are working with high resolution images, 2px will be too small. Build up a decent library of sizes.

Press Shift backspace (Shift+Del on the Mac) to open the fill dialog box.
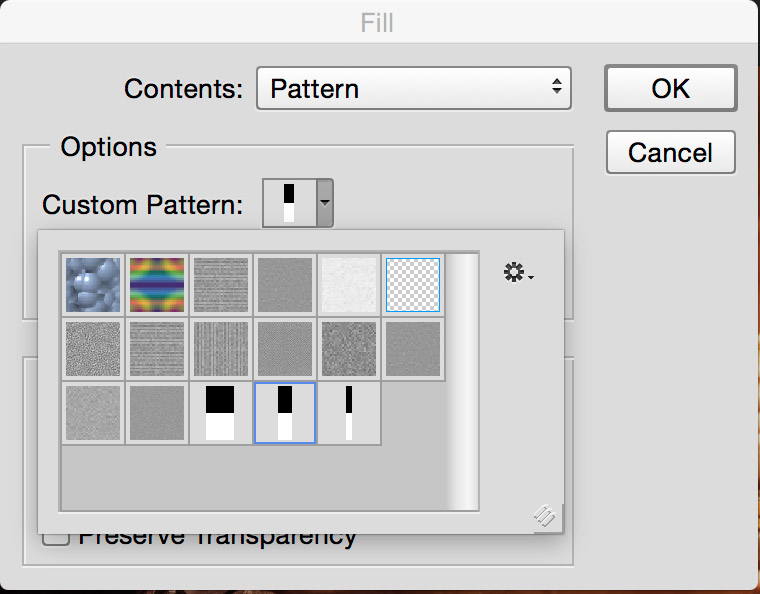
Make pattern the contents and select our scan line pattern in the custom pattern tab.
Click ok and you’ll see a pattern like this.

Change the blending mode mode and (optionally) drop the opacity down till it looks good
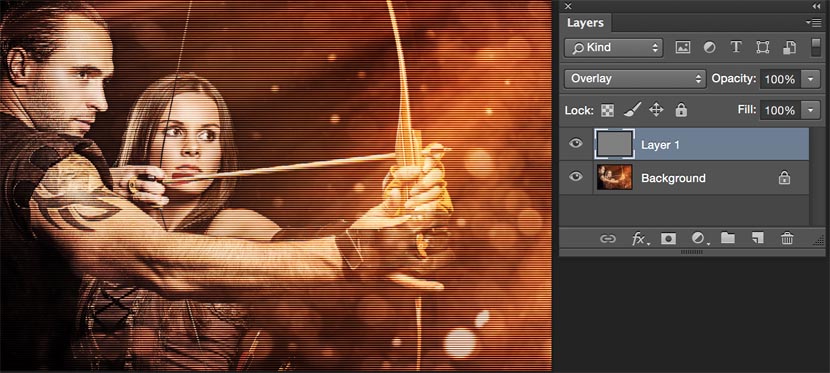
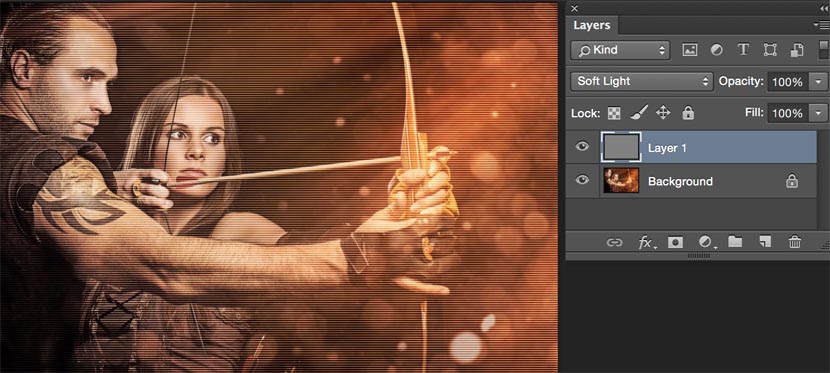
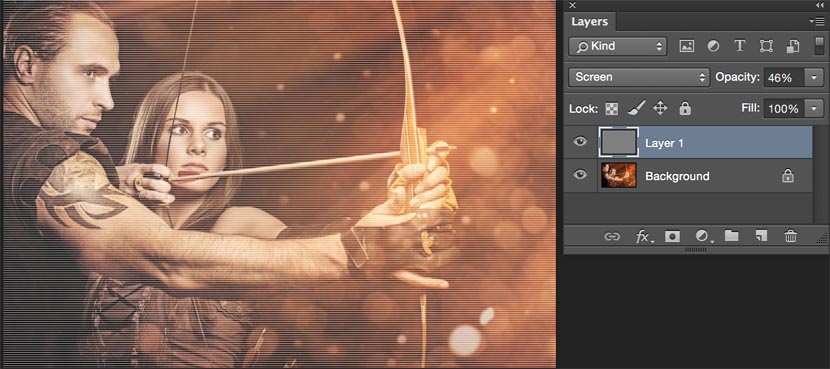
Here are the results of some different blending modes.
Overlay
Soft Light
Screen
Step 1: Making the pattern
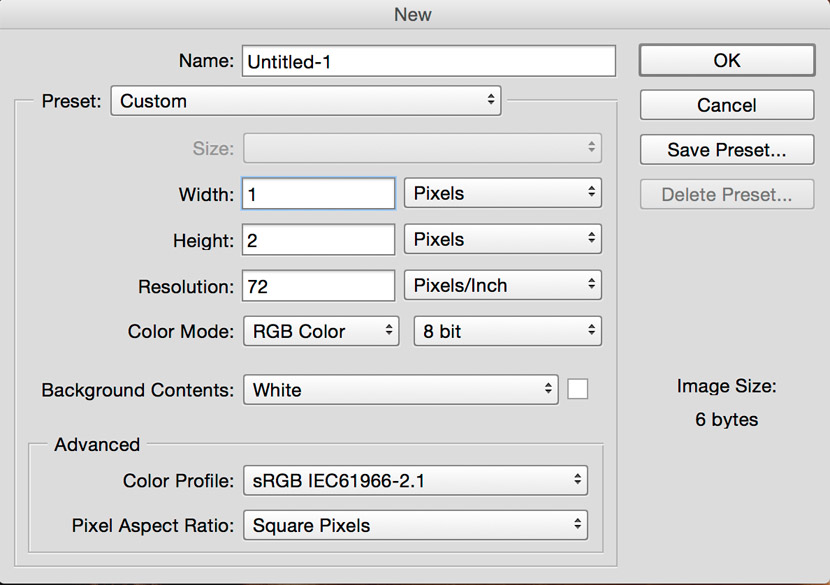
Let’s prepare our lines. Create a new document 1×2 pixels for very tiny tight lines for low res. We can vary the height for fatter lines, the width can be set to 1. Keep white as background color.Step 2
with the foreground color set to black, take the pencil tool and paint the top half of the image.
Step 3
Edit>Define patternThis box will come up, name your pattern. When you define a pattern, it is saved in the library for future use. Click ok
I usually make a number of different patterns at this point, so that I can have different thicknesses of lines, especially if you are working with high resolution images, 2px will be too small. Build up a decent library of sizes.
Step 4: Using the pattern
Open the image you want to add the scan lines to. I am using one from Dollar clubStep 5
Create a new blank layer above the image.Press Shift backspace (Shift+Del on the Mac) to open the fill dialog box.
Make pattern the contents and select our scan line pattern in the custom pattern tab.
Click ok and you’ll see a pattern like this.
Step 6
Now to display it.Change the blending mode mode and (optionally) drop the opacity down till it looks good
Here are the results of some different blending modes.
Overlay
Soft Light
Screen


0 comments: