Cropping To An Exact Size In Photoshop, Ultimate Photoshop Crop Tutorial
04:08:00
royal pic.world
0 Comments
Recently while I was conducting a Photoshop seminar tour, I realized that a lot of people were tripping up with the simple crop tool. It’s not that people don’t know how to crop an image, it’s that they don’t know how to do it an get the results they are looking for. The difficulty it seemed was cropping an image to the exact size needed for print or multimedia output. In this tutorial, I’m going to show you a some tricks with the crop tool, show you how to automatically crop to the exact size you need without math and then provide a few practical cropping tips in Photoshop. It’s pretty much a Photoshop crop tool primer.
Cropping can be done for 2 reasons:
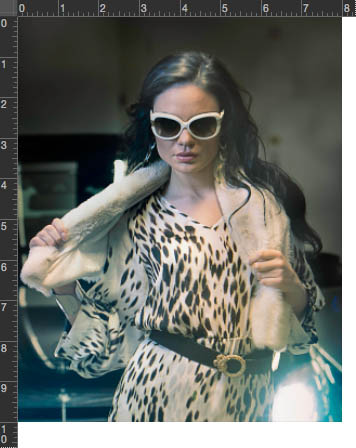
1. To change the physical size or aspect ratio of the canvas for print, multimedia use etc. 2. To change the composition of the image: To focus on a portion of the photo, while removing distractions. Digital zoom; This is exactly what digital zoom on your camera does, and why I recommend turning it off. You can do a better job in Photoshop.
Crop to exact dimensions and size with the Photoshop Crop Tool
In Photoshop CC, the crop tool was changed to offer more options (Don’t worry CS6- users, this tutorial is still for you). When this first happened, it caused some confusion. Let’s fix that right now. (You can also go back to the old way of using the crop tool by choosing the Legacy option in the option bar).
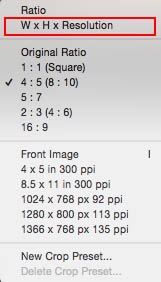
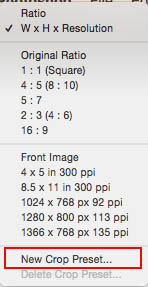
In the tool options bar at the top, change the option to W x H x Resolution. (Width, Height Resolution).
Step 3.
You can now type in your desired aspect ratio, or size. I have typed in 8 in x 10 in. I added the “in” to force the scale to inches. You could also use the ” inches symbol. If you don’t enter anything in the resolution field, it will just set an aspect ratio without any resolution (final size). This is where people get messed up. Shape, but not size. For resolution, enter the desired final resolution. For print, it’s usually 300ppi (DPI printed). For online, 72 is common. Also 180 or 360 works well for Epson printers. Now, when you change the crop area, it stays locked at the 8×10 aspect ratio: 8 (in) x 10 (in). It doesn’t matter what size you make the cropped area, it will always be 8 x10 (or whatever you entered into the boxes).
Step 4
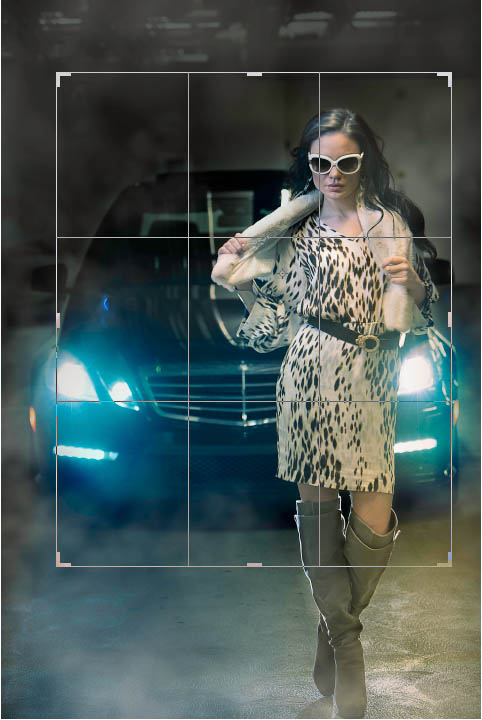
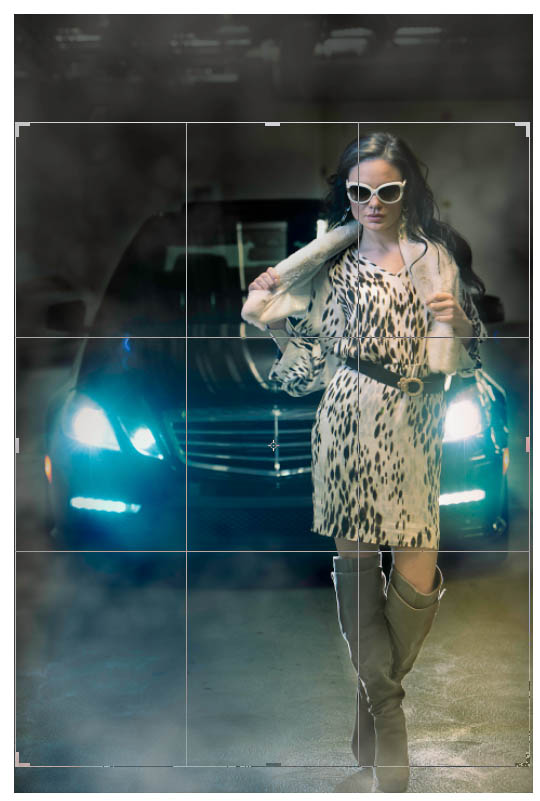
Press the Enter Key (or the checkmark in the toolbar) to apply the crop. Notice that it is exactly 8×10 inches. That’s because of the resolution setting. If you change the crop area and apply it, it will still end up at 8in by 10in at 300ppi
Even when you crop in really tight, it will still be the same final size.
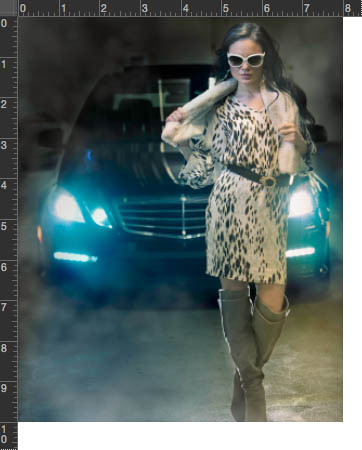
As you can see, this is really useful for preparing files without having to think too much or do math.
Xtra Credit
Making a Crop Preset
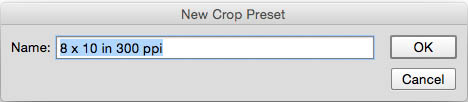
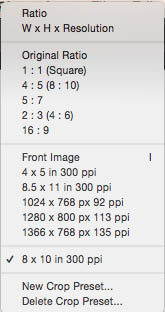
Let’s save these settings as a preset, so that we don’t have to enter it every time. In the drop down, choose, New Crop Preset
Photoshop will name it for you, or you can add your own name if you prefer. When you open the drop down menu from the options bar, the preset will always be available at the bottom of the menu for 1-click application.
Changing the Orientation of the crop tool
Notice that our cropping has all been in portrait orientation so far. If you want to change it to landscape, just press the double arrow tool which will flip the settings. They can also be entered in the boxes differently, remembering that the first number will always be the width and the second the height.
Clearing the Crop tool
If you want to go back to freeform cropping (Unconstrained) click the clear button and it will remove all the settings for you.
Non Destructive Cropping
When you apply the crop tool, by default it deletes the areas that have been cropped. However, if you turn off the option that says “Delete Cropped Pixels” Photoshop will create a new layer and change the size of the canvas to hide the pixels without removing them, so you can readjust the image afterwards.
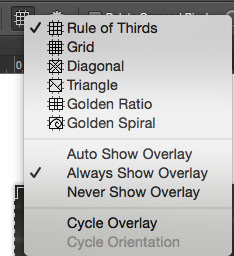
Rule of Thirds and compositional guides (Overlays)
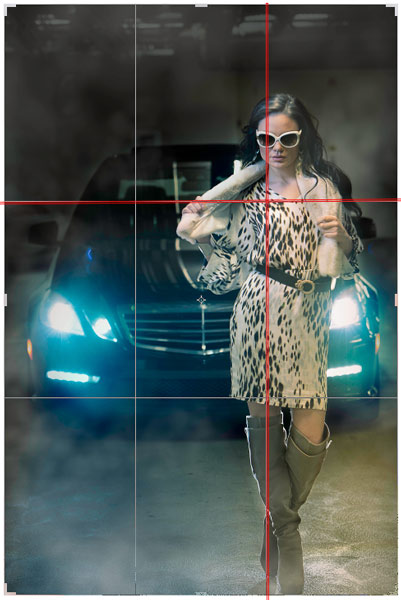
When you are cropping for composition, there are some tools to help you visualize your crops in Photoshop. You will see 6 different options that will show different overlays when the crop tool is in use. You can tap the “o” key to cycle through these. Golden Spiral shown here Here is the rule of thirds, this is the most common type of composition aid. When shooting and processing it’s pleasing to the eye to have important portions of the image fall on these 3rd lines rather than just slap everything in the middle. Important details can even fall on the intersection point of the horizontal and vertical lines.
Even more things you can do.
Another thing about the crop tool, it isn’t just for cropping into an image. You can actually drag the crop tool outside the image area into the canvas to enlarge the canvas area. Believe it or not, there are even more things that the crop tool can do. If you want to learn more and go this (and more) in depth with all the tools in Photoshop, you should checkout out flagship training, Photoshop For Digital Photographers (We have versions from Photoshop CS all the way to the latest version of CC).
My name is unnayan and this is my site.
New LAtest Dp's 4 All...!!! This Is Only Eduction And Fun Purposes....!!! WhatsApp No. +919166161353 Don't CAll ME.... ONly Msg.....!!!!


0 comments: