
Tutorials


How To Apply The Neon Effect With The Photo Editor
In this step-by-step tutorial, we’ll show you how to apply the Neon Effect using the photo editor. Read on to learn how to do it, and then share your own edits with the hashtag #NeonEffect!
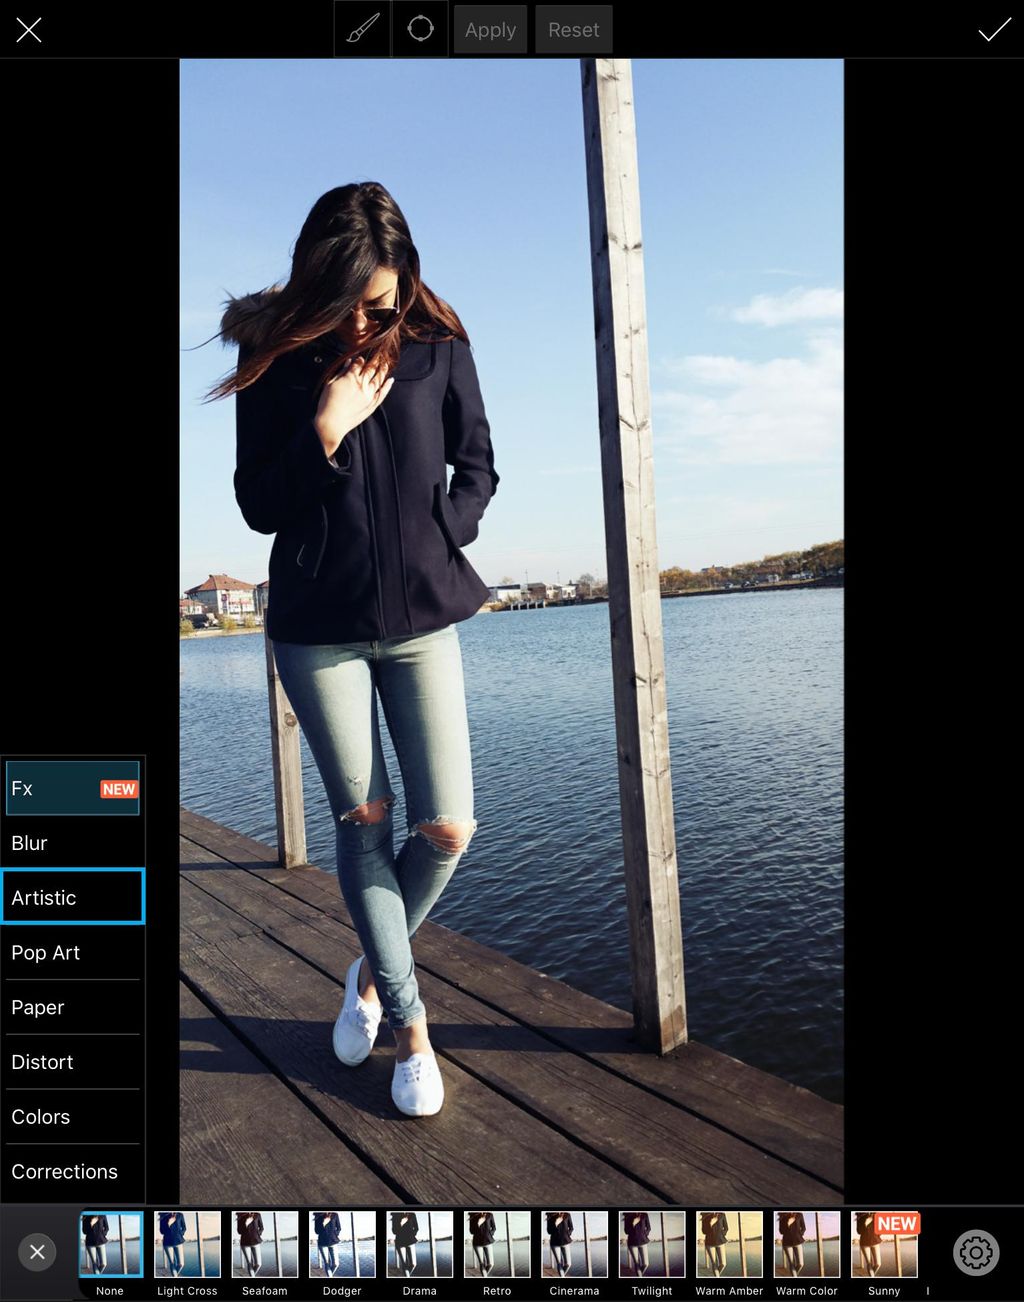
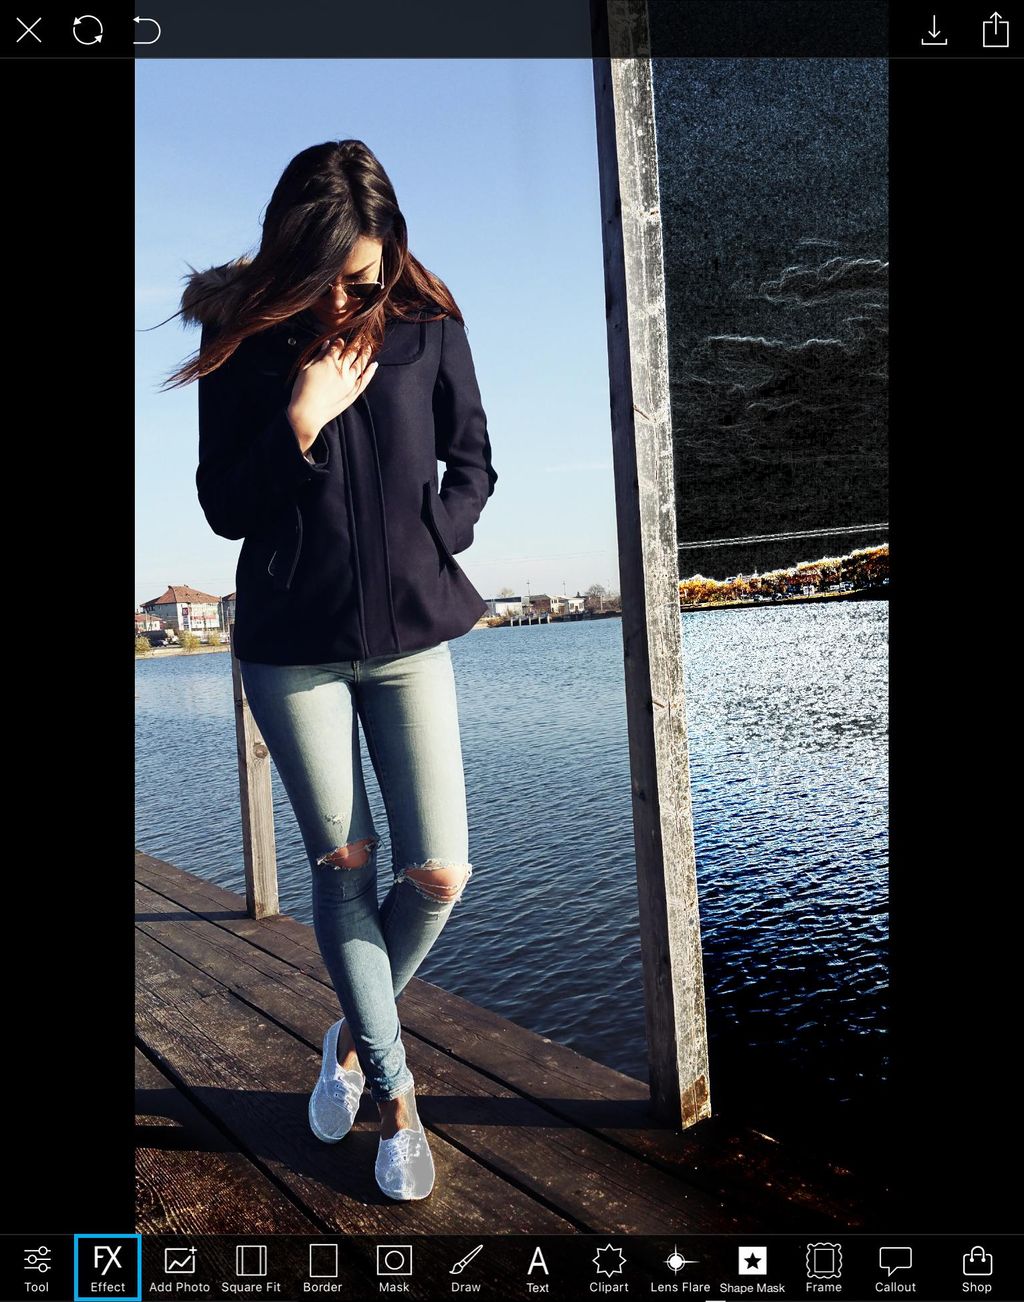
Step 1: Open Effects Menu
Open your image in the photo editor. Tap on Effect and select the Artistic section.
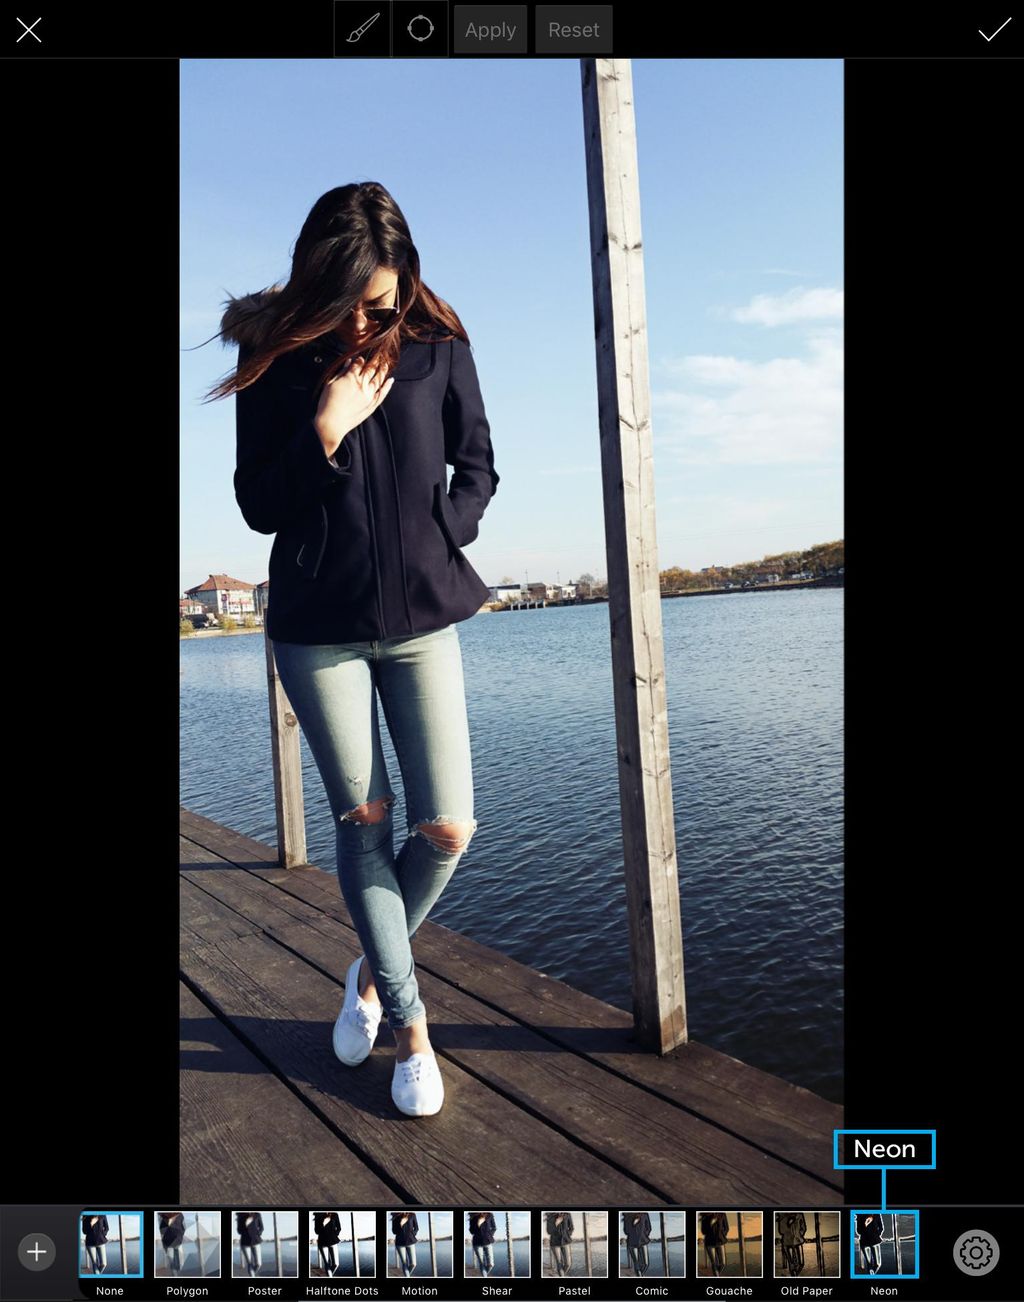
Step 2: Select Neon Effect
Select the Neon Effect. Tap on the gear icon to open the Effect settings menu.
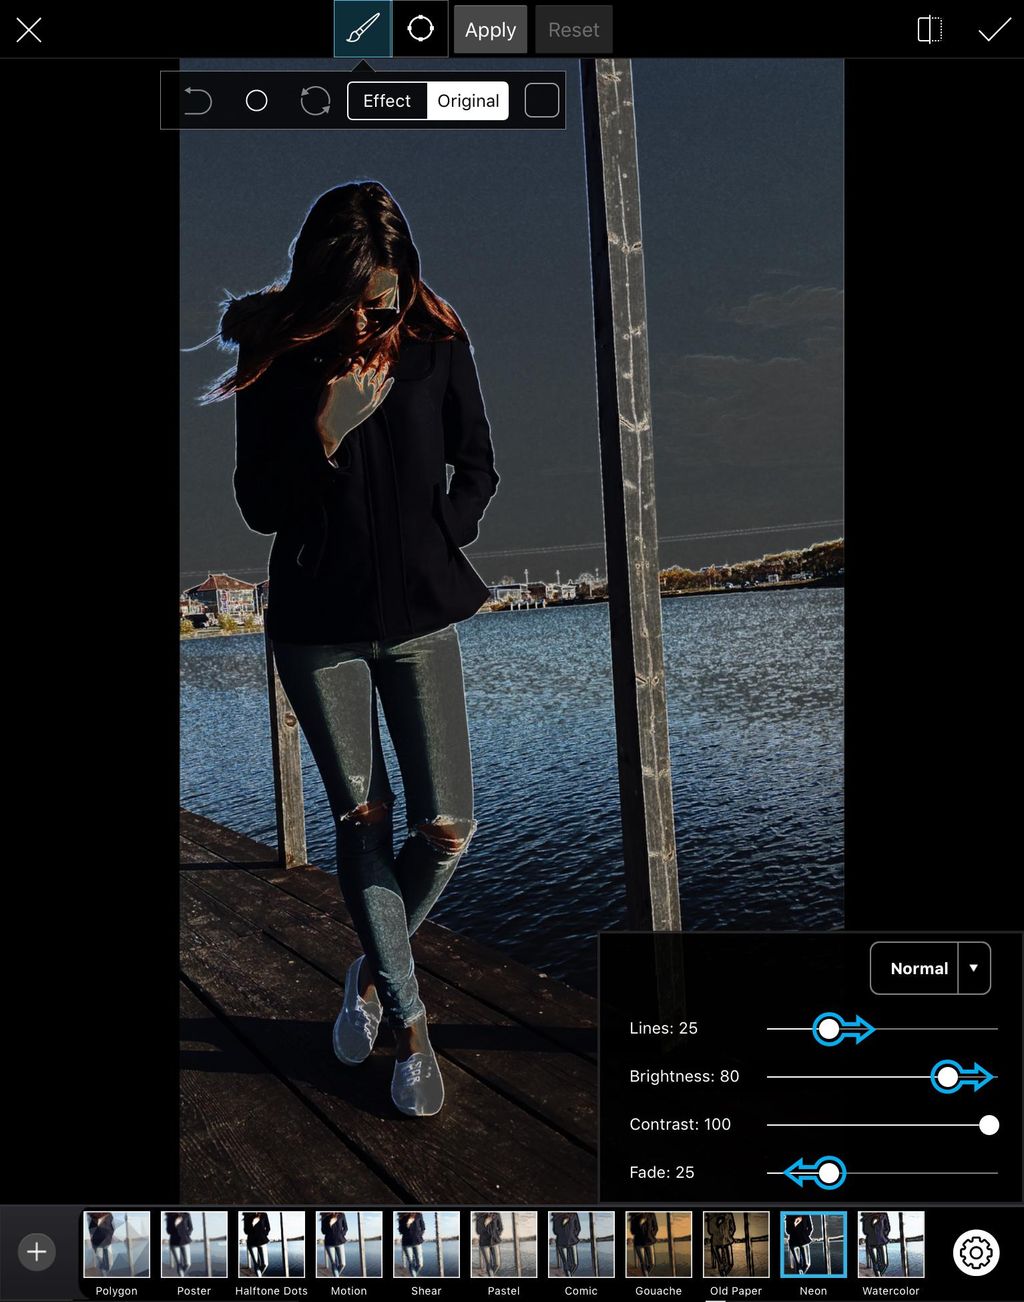
Step 3: Customize Photo Effect
Use the sliders to customize the photo effect. Tap on the gear icon again to close the Effect settings menu.
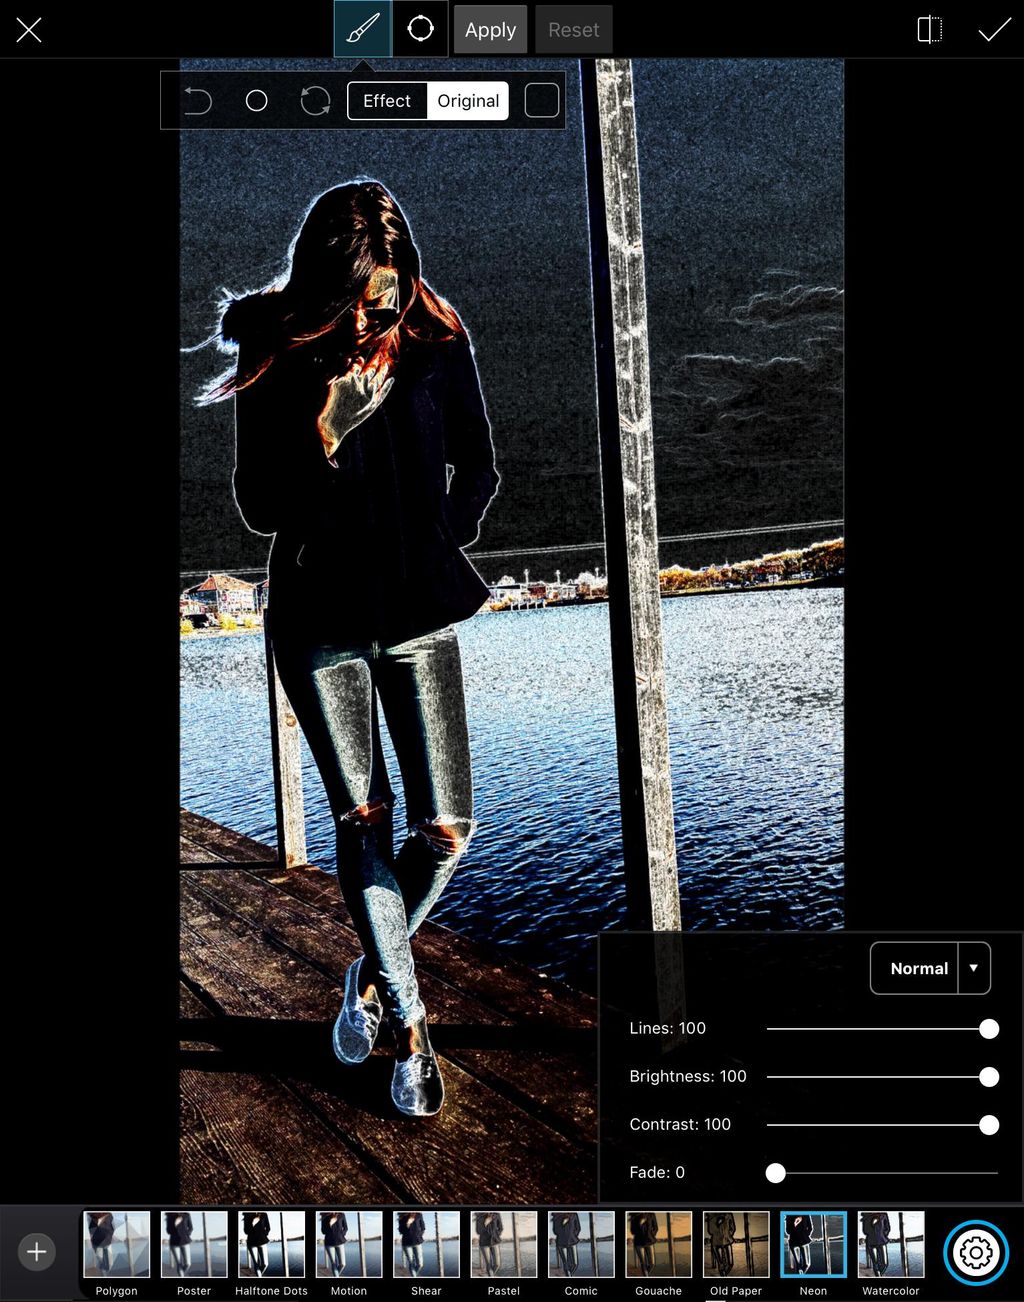
Step 4: Erase Effect
Use your finger to erase the photo effect on part of your image. When you’re done, tap on the check mark to confirm. Tap on Effect to open the Effects menu.
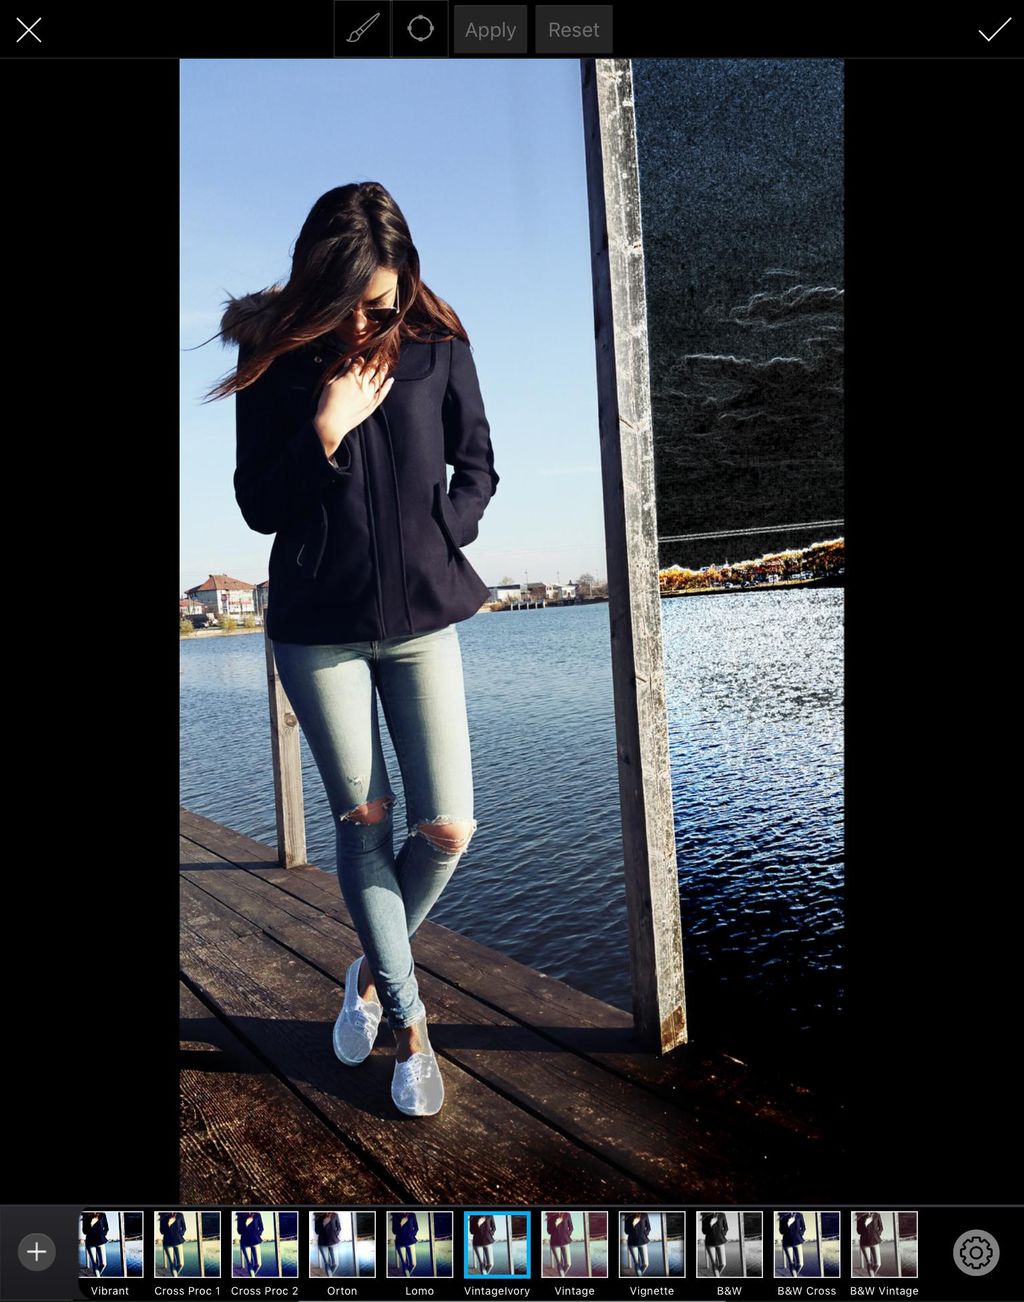
Step 5: Apply Effect & Confirm
Select the Vintage Ivory Effect from the Fx section and tap the check mark to confirm. Save your work and share it with the hashtag #NeonEffect!
0 comments: